
Three simple words that expressed hundreds of emotions for the most lovable character in the first "Guardians of the Galaxy" movie released in 2014. So this year, when "Guardians of the Galaxy Vol 2" introduced the very cute baby Groot, this mom and tot team decided to immortalize it in our home as a craft.
To retain the natural roots of Groot, this craft was made with mostly natural, recycled and reused materials - extensive use of 100% natural jute was done over re-used plastic moulds. Even Groot's naughty eyes are made of lentils for extra credit.
We love this cute addition to our craft collection. This was certainly one of the harder creations so far but very much worth the time and effort.

HOW TO MAKE GROOT CRAFT?
MATERIALS:Jute Twine
Ashland® Naturally Coiled Wire
Easter egg mould for face
Tooth-brush holder (lower part) for body
Green foam sheet
Mod Podge
Pair of lentil grains
Green+Yellow paint
White drawing paper
Hot Glue
Pencil
Scissor
Vase
Clay
Scrap Paper

INSTRUCTIONS:
1. Trace and cut the shape for the head on a rectangular paper (15.5cm x 4.5cm) making a nice crown like shape as shown below.

2. Wrap the paper crown around the egg and glue it tightly to the egg using hot glue.

3. Cover the egg and crown with jute twine using mod podge. Let it dry.

4. Glue the black painted lentil eyes. Make eyebrow and mouth with jute twine.
5. For the body, wrap coiled wire around the bottom part of tooth-brush holder.

6. Wrap five strands of jute twine covering the coiled wire for hands. Leave a little extra twine at the end making the fingers. Tie with twine making a nice wrist to hold the fingers.
7. Add a couple of coiled wire strands on the body giving the look of heavier branches.
8. Make a few leaves from the green foam paper and glue them to the body & hands.
9. Hot glue the head to the body.
10. Lightly touch up the head and body with bright green color.
11. Your Groot is ready to be potted. You can fill the pot with scrap paper and then cover it with brown clay. Place the Groot nicely on the clay. Finally touch up the brown clay with bright green color.
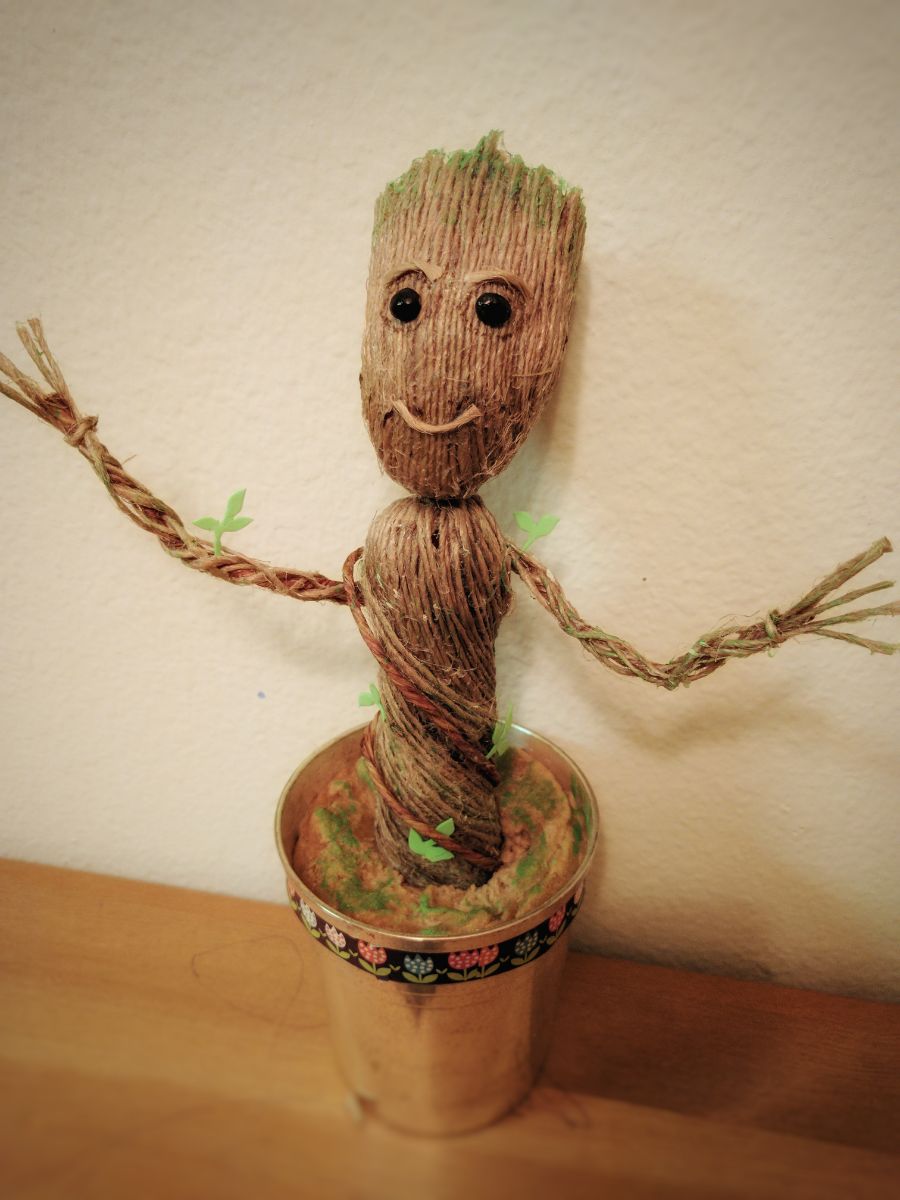
Enjoy!
SHARE:
No comments:
Post a Comment